

How To Register Git In Visual Studio Code
Visual Studio Code is a new, lightweight, cross-platform and open source code editor that you tin can download for free at http://visualstudio.com.
In the second of this short series of articles, published in association with Microsoft, Tech Evangelist Sergii Baidachnyi, will dive into the editor's Git-related features. (In case you lot missed it, check out the first article: Visual Studio Code: The top 5 features.)
Sergii uses a Mac for this demo but VS Code works on Windows and Linux computers as well.
Working with local Git repository
Assuming that you lot have no trouble installing Git on your local workstation, one time you've done then you can start working with information technology straight from Visual Studio Code.
First, you need to initialize a local repository for your current projection and add your files there. It's easy to practise this by clicking Initialize Git repositoryin Git view.
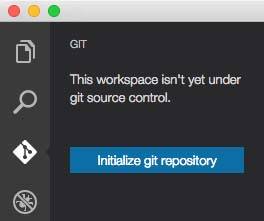
This push button will outset the init command for Git and will add all of the files automatically. Now you're gear up to work with Git locally.
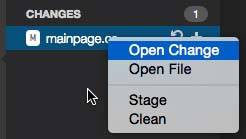
Working with files locally gives you admission to all the standard commands. By clicking whatsoever file and activating the context card yous can put the file on Stage:
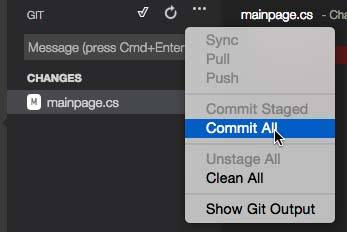
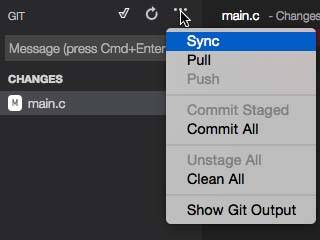
And using the menu at the height of the Git view you tin commit changes or get access to Git output:
Finally, clicking the branch name in the status bar volition open the Git Tool's control line.
![]()
Using the command line, you can execute commands such as git checkout and git branch.

Both commands have only one parameter: the proper name of a branch. Git checkout allows you to checkout files to a new or existing branch and git branch allows you to switch VS Code to a new or existing co-operative.
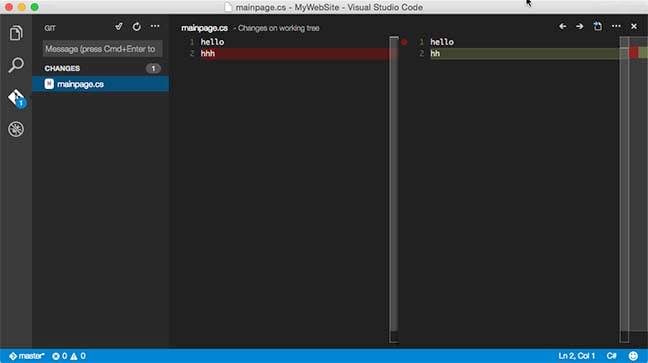
Using Git view you tin see which files have changed. Subsequently clicking on them you lot can review the current and previous versions of the file. VS Code highlights all of the changes as seen in this example:
Visual Studio Team Service as a provider
Git is just a platform and it requires a provider. If you are not going to gear up up your ain infrastructure, you can use GitHub or Visual Studio Team Service equally a provider. Permit's become with Visual Studio Team Service.
Visual Studio Team Service allows upward to five developers per account for gratuitous, and lets you create whatever number of projects. It also gives you access to additional features like sprint planning tools, task and Kanban boards, a virtual team room, and more.
And, of course, Visual Studio Squad Service supports Git. This ways that Visual Studio Code and Visual Studio Team Service can be used together. Activate your free Visual Studio Squad Service account at http://visualstudio.com.
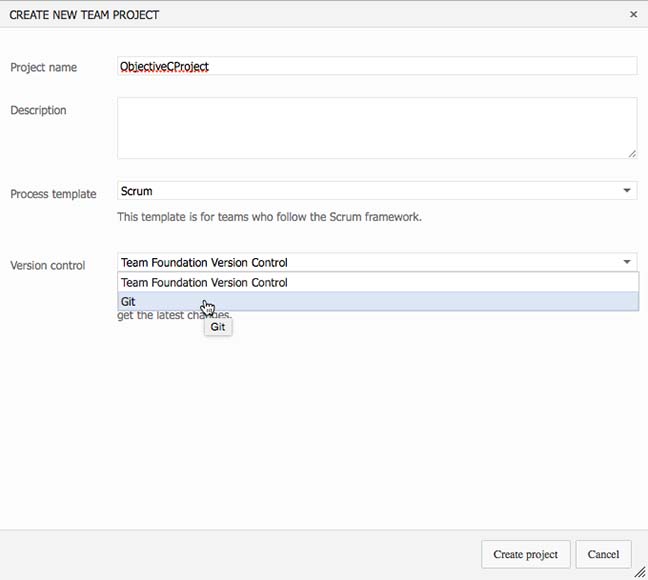
Once you get access to Visual Studio Team Service, you can create a project. In this case, a "project" ways everything that is related to the lifecycle of the awarding: a repository, team room, and and so on. Note that Visual Studio Team Service supports two types of version command systems, including Git.
In this instance, select Git:
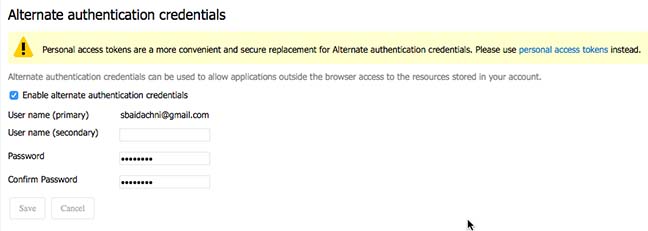
Afterwards the project is created you need to practice one more affair inside Visual Studio Team Service – open your contour and utilise the Security tab to apply alternate authentication credentials. Past default, Visual Studio Squad Service uses a Live ID for authentication, but Git tools don't support Live ID.
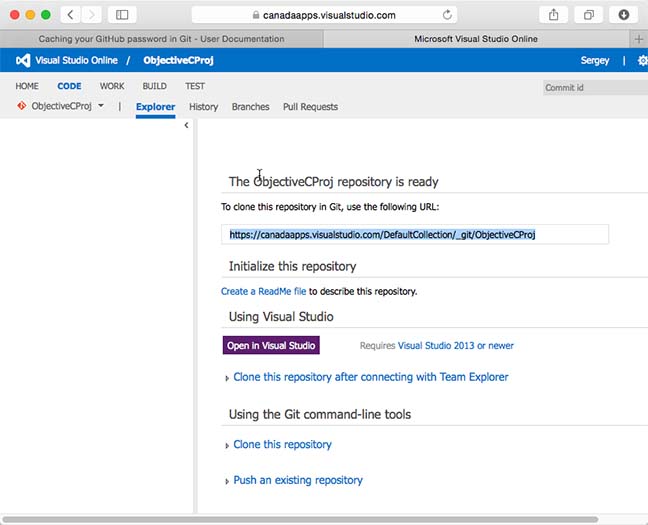
One more than step on the server side is getting a URL that y'all will use as a remote repository in Git. When you navigate to the projection and open the CODE tab, you will run into the URL – copy it for the next stride.
That's it for the server side; now information technology's time to configure your Mac. First you need to provide Git with your username, which you defined in Visual Studio Online as an alternate credential: :
git config --global user.proper name sbaidachni@gmail.com
You can create your alternate credentials in a last window within Visual Studio Code. It'south meliorate to do it in a terminal window within VS Code considering it volition open with the context of your workspace. Make sure that you have associated Git with the electric current workspace prior to executing the next control. Finally, you demand to add the reference to the remote repository:
git remote add together origin
https://canadaapps.visualstudio.com/DefaultCollection/_git/ObjectiveCProj</h
And push existing local files to the remote repository:
git push button -u origin –all
That'south it. Reopen Visual Studio Code, and you should see that most of the card items in the Git tab are at present enabled:
You tin start coding and commit all changes to Visual Studio Team Service.
GitHub equally a provider
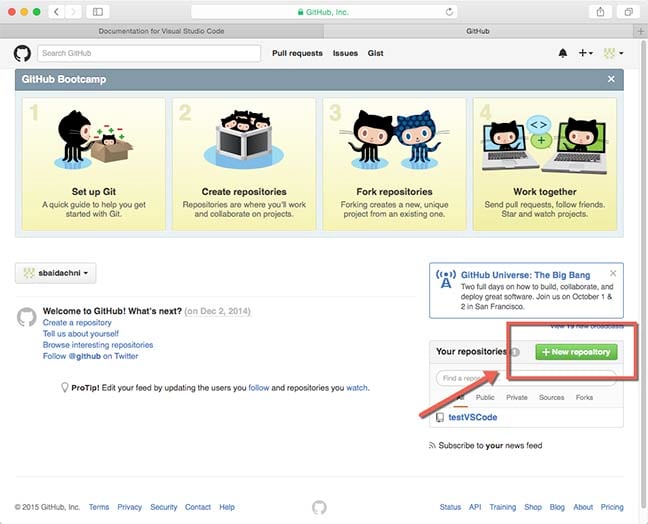
If you don't already take a GitHub account, you can create one at github.com. Once you take a GitHub account, yous can create a new repository or use an existing one. In the screenshot below yous can see how to create a new repository with the New Repository button on the main page.
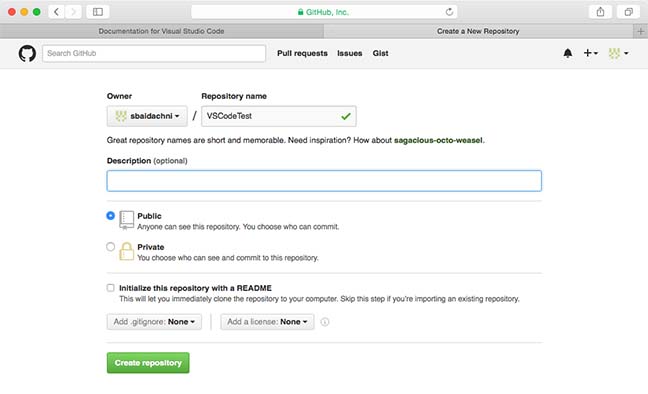
Once your repository is created, copy the link for cloning (run across below) which volition be used to initialize your Git arrangement:

The side by side stride is to open a terminal window in social club to setup GitHub equally a remote repository. To open a terminal window, I often use the VS Lawmaking context bill of fare by selecting whatsoever file in the Explore sidebar. If you lot don't have whatsoever files in the Explore side bar, don't worry, y'all still can open a final window in VS Code directly.
To exercise and then, you need to activate the Control Palette using the View bill of fare item or ⇧⌘P hot key combination. Using the Command Palette, you can phone call a terminal window in the context of the folder:

In this case, the terminal window doesn't have the context of a working folder. And then, you'll demand to navigate it manually. Using a terminal window, you can associate git with a user proper name that will be shown in commits history:
git config --global user.name sbaidachni
And clone the GitHub repository to the local binder using the link which we copied before:
git clone https://github.com/sbaidachni/testVSCode.git
If the performance is successful, you should see something like this:

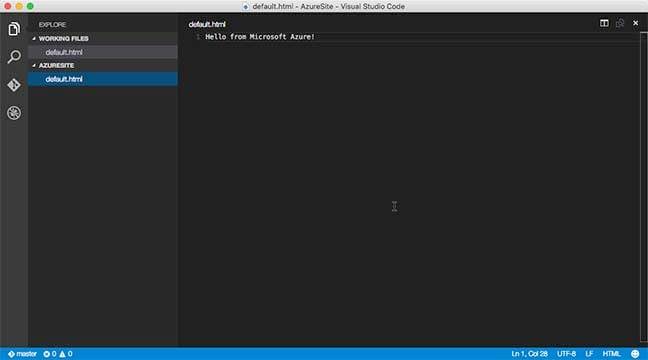
That's it – now you lot can use Visual Studio Lawmaking to open the cloned folder. VS Code volition read all of the information about the repository automatically. Yous can now start coding..
Git and deployment
Finally, let's discuss how to employ the Git and Visual Studio Code integration features to implement deployment tasks to the cloud. Visual Studio Lawmaking doesn't accept any directly integration with Microsoft Azure (Microsoft's deject) yet, you can still deploy your project to the cloud with minimal try.
To start working with Azure, y'all'll need an Azure business relationship. You tin can sign up for a trial account at http://azure.microsoft.com or use other options such every bit BizSpark, DreamSpark and MSDN subscriptions. Once you have an account, access the management portal at https://portal.azure.com.
To offset experimenting with Azure, create a projection that contains a single html file. After on you can create node.js or ASP.Cyberspace project – the procedure volition exist the same.
Earlier starting to piece of work with the Azure portal, yous demand to open up a Git view and initialize a local git repository. Now, open the management portal using https://portal.azure.com/ and create a new Web Application:
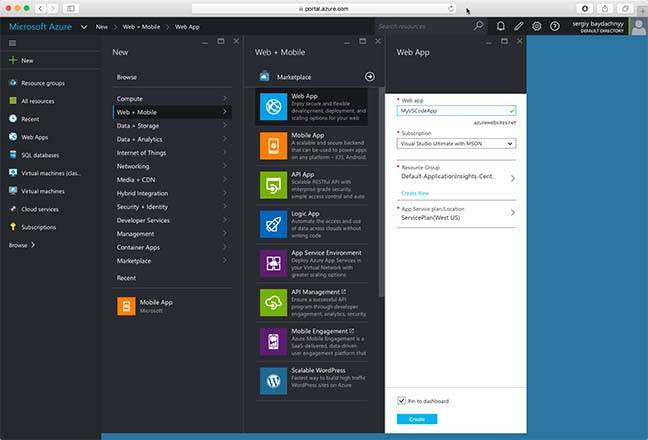
With the Web App template, y'all tin can easily create hosting storage for your site and deploy almost anything to it, including PHP, Node.js, ASP.Internet and other Web applications.
Once the empty web site is deployed, open up the Settings and start configuring the deployment:
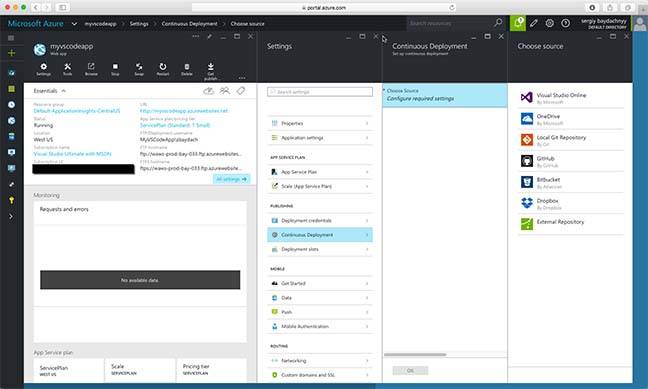
Equally you'll see, Microsoft Azure supports several dissimilar sources. You lot tin get your source code from OneDrive, Dropbox, and local Git repositories, GitHub and Visual Studio Online. As Visual Studio Lawmaking currently but supports the final three options, yous tin can select any of the options in the menu.
For our purposes, select Local Git Repositories. You'll see that Azure will add a Git clone URL to the configuration of the site.
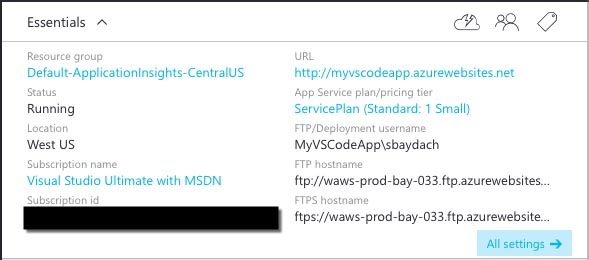
Note that you need to setup FTP deployment credentials to commencement working with Git. You tin visit Settings and provide credentials using Deployment credentials tab.
When the credentials are ready, you can continue with Git setup on your local automobile. Yous demand to copy the Git clone url from the Azure portal and open a last window in context of the working binder.
Because nosotros have already initialized a local Git repository, nosotros can acquaintance it with our remote repository and push the initial commit past calling the following commands:
git remote add azure <url> git button –u azure master
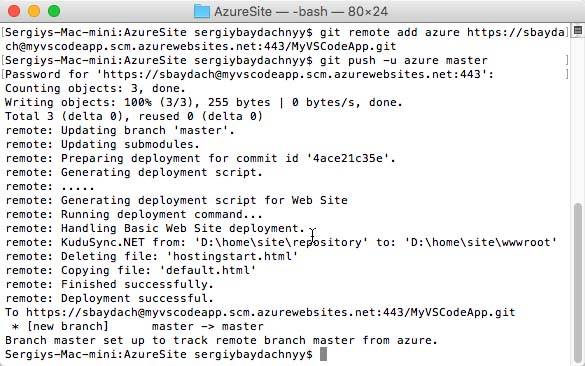
If everything is OK, yous tin find your deployment on the Continuous Deployment tab:
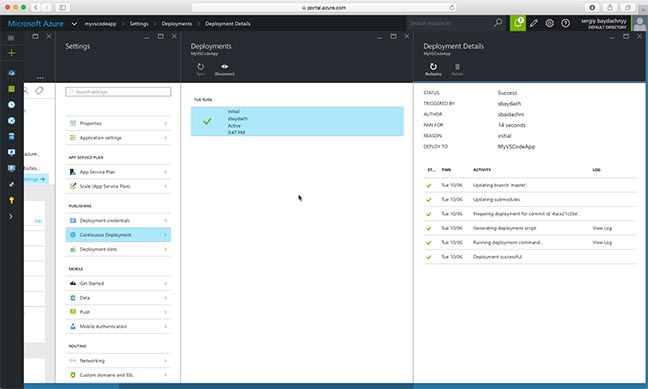
And you tin can apply the site URL to open the spider web site:
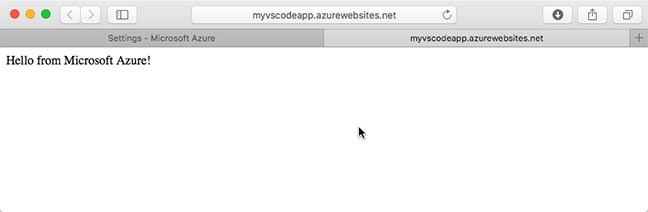
Correct after the initial commit, you tin can close the Terminal window and continue to work with VS Code and perform all Git activities in that location. That's all for this commodity; bank check back next week for the next technical article in this Visual Studio Code series!. ®

How To Register Git In Visual Studio Code,
Source: https://www.theregister.com/2015/12/07/visual_studio_code_git_integration/
Posted by: ortegahadyinst.blogspot.com
0 Response to "How To Register Git In Visual Studio Code"
Post a Comment